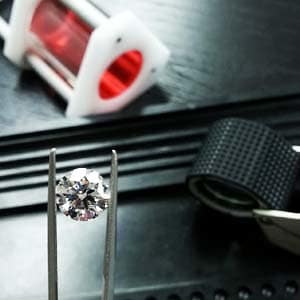
Diamond grading is the process of evaluating the stone's characteristics for valuation purposes. The first step in examining a diamond for clarity is obtaining the proper tools. For example, this 10x diamond grading loupe from Amazon will come in handy.
You will also need a pair of locking tweezers, a lint free cloth, and an adequate light source. In most cases, an ordinary desk lamp with a daylight fluorescent bulb is sufficient.
It will most likely be easier for you to view a diamond through a microscope. Many jewelry stores will have a microscope available for your use. However, not all jewelry stores own a microscope and others wouldn’t let you use it if they did.
Nevertheless, most of our industry grades diamonds for clarity using a hand held ten power magnifier known as a "loupe” (pronounced loop) and you can also.
Which Diamond Grading Loupe Should You Buy?
A loupe differs from a regular magnifying glass in that it is fully corrected which prevents objects from being distorted. When selecting or using a loupe, make sure that it is a fully corrected, ten power (10x), triplet loupe.
Some stores will try and "pull a fast one” on you by slipping you a five or six power loupe. The construction of the loupes look the same, but they deliver completely different results.
Obviously, using half the power of magnification is going to look a whole lot better. Make sure that the loupe you are using has a 10x stamped on it somewhere.
How to Use a Diamond Grading Loupe:
Learning to use a loupe can be challenging and you may feel a bit foolish at first. It’s not going to help that every jeweler in town makes using a loupe look like no big deal. Realize that they’ve been doing it for a lot longer than you have and they’ve had years of practice.
A good sales person will take the time to show you how to properly and effectively use a loupe. I used to teach our customers to use a loupe in the following manner… If the loupe is closed, open it.
Understand that the loupes we use for diamond grading are double corrected. In that case, you may look through it from either direction. Consequently, you may want to take your glasses off if you wear them. Although you can see that Brian Gavin keeps his on in the picture above.
As a matter of fact, there is no right or wrong side of the lens to look through. Loop the index finger of your dominant hand through the opening of the loupe’s protective case. Then, hold the diamond ring or diamond mounted in tweezers in your opposite hand between your index finger and your thumb.
Next place the three remaining fingers from each hand against each other to form a stationary base. At this point, the diamond and loupe should be about 1/2 – 1 inch away from each other.
Sit upright with your elbows comfortably rested on a table. And bring your hands towards your face until the loupe is about 1 – 2 inches away from your eye.
Be sure to keep your head up as if you were talking with a friend across the table. People have a natural tendency to hang their head over the loupe and tweezers (looking down at the table). That blocks out the light source preventing proper grading of the diamond.
Practicing Diamond Grading Makes Perfect:
Using a loupe may seem a little awkward at first, but with a little practice you will soon get the hang of it. We recommend that in the beginning you practice by looking at your fingerprints and fingernails. This accomplishes several things.
First it will give you an appreciation for the degree of magnification that you are using and how minute a diamond's flaws actually are. Secondly, it boosts your local economy in that it emphasizes the need for a good manicure.
Next comes my favorite part… Teaching you how to use diamond tweezers and watching your face when you squeeze the tweezers just a little to hard and the diamond pops out and flies across the room.
Don't stress because it happens all the time, even to people who have been in the industry all of their lives. However, lay-peoples reactions are classic. If you do shoot a diamond across the room, don't panic just find it. Try turning off the lights and scanning the floor with a flashlight.
How to Use Diamond Tweezers:
Diamond tweezers are quite different from the tweezers you use to remove a splinter or pluck your eyebrows. Most diamond tweezers measure about 6 inches in length. They usually have a very fine tip with a groove or rough finish on the inside edge to hold the diamond in place.

How to Use Diamond Tweezers.
Most retail jewelers use tweezers that are equipped with a slide lock. In that case, the slide-lock helps to hold the diamond in place and make it easier for you to inspect it.
The easiest way to secure a diamond in the tweezers is to hold the tweezers in your dominant hand between your thumb and middle finger. Place your index finger just inside of the tweezers opening exerting just enough pressure to open the tips slightly.
Then, use the tweezers to flip the diamond on to it's crown (top side of the diamond that faces you when it is mounted). Next, lower the tweezers around the diamond and gently move the slide forward (towards the tips) until it just barely catches.
Helpful Tips & Tricks:
Remember that you are not tightening a nut on a bolt, so use very little pressure. As a matter of fact, you can damage the edge of a diamond by exerting too much pressure! As with learning to use a loupe, this too will become easier with practice.
The purpose of using tweezers to hold a diamond has nothing to do with sterility. So, don't be afraid to pick up a diamond with your fingers because you can't hurt it.
Although that may be true, you will leave some oil and smudges on a diamond if you touch it with your fingers. In that case, you'll see tiny white pinpoints under magnification. You can clean the diamond by dipping it in ethyl alcohol. Then, just wipe it dry with a lint free cloth to clean it before you grade it.
Evaluating the Diamond:
Once you have obtained the equipment necessary to grade a diamond, proceed as follows:
Clean the diamond by rubbing it with a lint free cloth. If necessary, soak it in ethyl alcohol or have it professionally steam cleaned by a jewelry store. Once the diamond is clean, mount it in a pair of diamond tweezers.
Examine the diamond from all angles with your eyes to determine whether any inclusions or blemishes are visible without magnification from the top of the stone.
If you inspect a diamond with a loupe before grading it with your eyes, you are more likely to mis-grade the diamond. That's because our eyes have a tendency to see what they expect to see.
If you locate the inclusions under magnification and then inspect the diamond with your eyes, then you are more likely to imagine that you can see an inclusion regardless of whether it's actually visible to the unaided eye.
Keeping Things In Perspective:
Be sure to examine the diamond with a 10x loupe from all angles. As a matter of fact, most jewelry store clerks will object when you inspect the underside of a diamond. In fact, they'll probably tell you that all grading is based on the visibility of inclusions as inspected from the top of the stone.
As a matter of fact, that is true. However, you should ignore them and inspect the diamond from all angles. That way you'll become more familiar with the appearance of inclusions. And you can use the time to ensure that there are no chips on the underside of the stone.

17.9 mm US Dime at 10X Magnification.
In addition, most laser drill holes and clarity treatments are difficult to detect from the topside of a diamond. Note that for viewing inclusions, your light source should be situated so that light passes through the side of the diamond.
In the event that you're trying to verify the presence of surface blemishes, then the light should reflect off the surface of the diamond.
Consequently, this is what the surface of a dime looks like at 35X magnification. That's the degree of magnification used by Brian Gavin to show the clarity characteristics. In case you're wondering, we took this picture using the standard settings on his imaging system that is state-of-the-art.

